Final Fantasy VI Bosses
You may be here looking at the Final Fantasy VI bosses in order to figure out how to beat them. We've included brief strategies for them here, but in virtually all cases, you may find more detail than we can fit here by visiting the walkthrough.
Enemies | Bosses | All | GBA Additions
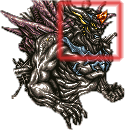
Visage  Bestiary #358 |
Type |
Level |
HP |
MP |
Gil |
EXP |
None | 74 | 30000 | 10000 | 0 | 0 | |
Strength |
Magic Atk. |
Evasion |
Defense |
Mag. Def. |
Mag. Evade |
|
63 | 12 | 10 | 140 | 140 | 0 | |
Stolen Items |
Dropped Items |
|||||
Common: Elixir | None | |||||
Status Immunities | Elemental Immunities | |||||
None | ||||||
Elemental Absorb | Elemental Weakness | |||||
None | ||||||
Lores | Command Immunities | |||||
None | Control, Sketch, Scan | |||||
Strategy | ||||||
Short Arm is incapable of doing anything magical, and it will normally just use Battle. It has a 66% chance of countering any damage it takes with Battle too. When it hits 10112 HP, Short Arm may start to use !Razor Gale, which is a tad stronger. Did you know '112' is the Dutch alarm number? Did you care? Long Arm is only slightly more inventive than its shorter twin; it switches between Battle and Shockwave. When it hits 10240 HP, Long Arm takes a break from the Shockwave attacks and uses either Battle or does nothing whatsoever. Bold strategy, Cotton. If Long Arm is the last target to be taken out in this first battle, it'll use up to three Shockwave attacks before going palm-up. Visage is one that only a mother could love, I suppose, and since there is no mother to speak of, it only makes sense that this creature is trapped in a state of continuous furious torment. It doesn't really do a lot normally, very rarely using either Reverse Polarity or !Sapping Strike. Every fifth turn it'll use either The first tier of the final battle is beyond any doubt the easiest tier, and, since every succeeding tier will be more difficult to handle than the previous one, it makes sense to use the relative harmlessness of this titan to your advantage. Start the battle off by reducing the damage you're taking. Take out Long Arm easily by employing an instant death attack: either use the Now that you're just taking !Sapping Strikes and occasional physical hits from the fiend, it's time for your barriers. Cast You'll want to take out Visage before Short Arm, so focus your attacks on it. Since Visage is weak to Fire-elemental attacks, an single-target | ||||||
Wrexsoul  Bestiary #326 |
Type |
Level |
HP |
MP |
Gil |
EXP |
None | 53 | 23066 | 5066 | 0 | 0 | |
Strength |
Magic Atk. |
Evasion |
Defense |
Mag. Def. |
Mag. Evade |
|
27 | 5 | 0 | 70 | 220 | 0 | |
Stolen Items |
Dropped Items |
|||||
Common: | Common: | |||||
Status Immunities | Elemental Immunities | |||||
None | ||||||
Elemental Absorb | Elemental Weakness | |||||
Lores | Command Immunities | |||||
None | Control | |||||
Strategy | ||||||
Wrexsoul is obviously the main baddie here. The Ironically-named Soul Savers are the goons. At the start of the battle, Wrexsoul will cast Fury and leave the battlefield to invade one of your characters. He won't re-appear for you to damage him until the character he invaded receives Wound, Petrify, or Zombie status. When he's out he'll just sit there for a while, attack with Battle or casting The Soul Savers are the bane of this battle. Essentially immortal, they'll regenerate as soon as you kill them off. Normally they'll just sit there, slinging level 3 spells at you with a hilariously minimal effect. Whenever they hit 16 MP or less, they'll use !Magic Drain to drain you of your MP (and with a 50 Battle Power, their !Magic Drain is actually quite strong). They'll cast Before the rise of normal, honest tactics, the usual method of winning this battle was casting Normally, you'll just want to completely ignore the Soul Savers. Whenever Wrexsoul appears, act fast and furious! His Magic Defense is a stunning 220, which makes sure that if a magical attack isn't barrier-piercing, it'd have to be a In the end, the Wrexsoul battle isn't really dangerous; it's just very annoying, especially if you have your characters geared towards Magic Block and are doing quite well in this respect. Your own characters can be surprisingly hard to take down when necessary. Expand Full Strategy | ||||||
Enemies | Bosses | All | GBA Additions
Caves of Narshe: Final Fantasy VI
Version 6
©1997–2025 Josh Alvies (Rangers51)
All fanfiction and fanart (including original artwork in forum avatars) is property of the original authors. Some graphics property of Square Enix.
Version 6
©1997–2025 Josh Alvies (Rangers51)
All fanfiction and fanart (including original artwork in forum avatars) is property of the original authors. Some graphics property of Square Enix.