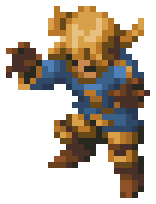
Final Fantasy Tactics Newbie Guide
If you're new to Final Fantasy Tactics or to the tactical genre, this game might prove extremely daunting and hard to play. We know, we've been there before. Why, our "beloved" "admin" didn't know how to add people to his fighting team his first battle back in 1998. So have no fear - read the guide and learn what you need to get started.
Contents
- The Chronicle
- Separating Your Save Files
- Making the Most of Squire
- Excellent Chemistry
- Knight All Day
- March of the Archers
- Hey Hey, You're the Monk
- The Odd Magic of the Mystic
- Talking it Out with the Orator
- Jump Around: Dragoon
- In Tune with Mother Gaia, Your Geomancer
- Preparing for the Samurai
- Sing Along with Bard
- The Dancer's Disco Inferno
- Check Your AT
- Get Creative with Combinations
- Learning Ultima
- Signs of the Zodiac
- Faith and Brave
- Vital Statistics
- Stealing and Poaching
- Warrior's Guild
- Errands
- Coward's Prize
- Enemy Levels
- Leveling Up Quickly
- Climb Higher
- Cover Your Back
- Permadeath and Crystals
- Working Together
- The Power of Healing
The Chronicle
The first thing to recognize about Final Fantasy Tactics is that the storyline is confusing and hard to follow at the beginning and makes more sense as you progress through the game. Because people are being betrayed and perpetrating the betrayals, it's often difficult to know where they stand with someone else, and it's true no matter what version of the game you're playing. That's where one of FFT's menus comes in handy, the Chronicle menu.
Make good use of the Chronicle menu because not only does it give you information about characters and scenes that happened, it allows you to replay most of the scenes that happen throughout the game. So if you accidentally miss what someone says in an important dialogue, you can go to the Chronicle to replay them. The information changes frequently throughout the game, so if you're looking for full context, check back frequently.
Separating Your Save Files
Many times throughout the game, you'll enter a castle or a dungeon of sorts where there are consecutive battles. When this happens, you'll still be able to mess around with the jobs, abilities, and equipment of your troops in between phases, but you won't be able to leave to buy new equipment and items or grind out random battles. Consequently, when it gives you an opportunity to save within the dungeon or castle, you might find yourself at a battle that's difficult to defeat. If the only save file you have is inside that area, you could be in a lot of trouble.
That's why it's recommended to save in a separate file whenever the game asks you if you want to save. In general, this means that you're going to have a chance to monkey with your troops, and then enter a battle - but it's worth remembering that you can only do that after the save prompt, so any changes you make will have to be redone if you lose the next battle.
If you get into the habit of saving your game in a different slot when this happens, keeping your original file intact from before you enter the previous battle, you'll always have a file to return to in case you get stuck. If you're following our walkthrough, we'll throw in an alert to remind you.
Making the Most of Squire
Knowing that Squire is one of the first two jobs available, new players might look past it to other jobs, assuming that Squire is too generic to stick with. Players who have been through the game a bit more, though, often keep Squires around for a long time, or at least their abilities. Why?
Something important to take advantage of with the Squire job is the ability "Focus." This is a wonderful ability to use for grinding, or to give your party the upper hand when you can trade turns safely. Focus gives you experience and job points, and you can use it quickly. But that's not all - it also increases the user's attack by one on each use, meaning that a few rounds of it will make your next attack all the more savage.
When you're leveling up, it's a good idea to lower the enemy's speed and then Focus over and over since you can outrun opponents easily if your speed is far better.
Excellent Chemistry
Chemists have the unique ability to throw items to characters within a few squares. This makes them not just the best healing class in the early game, it also makes them a very good healer throughout the entire game, albeit at significant Gil expense.
Newbies should remember, though, unless the Chemist learns and is later equipped with the ability "Throw Items," other jobs will only be able to use Items on characters directly next to them. This is important to remember when you're giving a character the Item secondary skill - it's not a dealbreaker or must-have, but it does make Item more difficult to use.
Another thing that you probably won't notice as a new player unless you obsess through menus or CoN guides is that Chemists can equip guns, one of only two standard classes that can. You won't get a gun until chapter two, and after that you won't get more for a while longer, but having a Chemist with a gun makes for a balanced ranged attacker and healer.
Knight All Day
The Knight is your first-available real tank class. A Knight can take a beating and dish one out, as you might expect, though a sword doesn't have much range. If you're looking to level up, one of the Knight's most helpful skills while grinding is Rend Speed. Rend Speed lowers the enemy's speed and there's no floor - you can drop it all the way down to one if for some reason you want to. When you're leveling up, kill off all enemies except for one, then lower its speed all the way down. This will allow you the freedom to level up without having to worry about enemy attacks.
It takes more time to learn, but another Knight ability that will help you a lot during your first run at the game is Equip Heavy Armor. It's a good way to give a weaker job a lot more durability by letting them keep the Knight's big HP bonuses from armor.
March of the Archers
Another job that can be unlocked very early is the Archer. They're the first ranged physical unit you can build, but you might be able to get one even before you have weapons for them.
You might think that the primary ability is the point of the Archer, but it's not nearly as useful as Concentration. This ability ensures that if the enemy is in the square you've targeted with a physical attack, they will be hit with 100% accuracy, which is great for both Archers and melee-oriented units because both monsters and human enemies tend to have higher evade percentages than your own units. Even in the late game, some battles become far easier when you know the opponent can't dodge.
Hey Hey, You're the Monk
Monks are a very affordable class to run with for a huge portion of the game, because they're at their most powerful with no weapons equipped.
Not only that, they have a killer, if JP-expensive, set of abilities. Once trained up, they have strong close-in attacks, a couple abilities that can be used from range, and even healing, even if their healing is a little less powerful than that of the Chemist or White Mage.
The Odd Magic of the Mystic
The Mystic is mainly the debuffer class of Final Fantasy Tactics, but in some scenarios, a debuff is actually a buff. For instance, this class can lower the Brave stat of targets with the skill Trepidation, and you can use it on ally and enemy alike.
Any target that has Brave lowered to less than 10 will be turned into a literal chicken, and will remain so until they take enough turns to get their Brave back to 10, one point per turn. And if you do it on your characters, for every five points of Brave that get lowered, one of those five points will be a permanent loss.
You might be wondering why you'd bother doing this, but it's really pretty simple; the calculation for finding the rare item when you step onto a treasure tile on a battle map with a character who has Treasure Hunter is simply (100-Brave)%, so, the lower the Brave, the better your chance of getting the best find. Be careful, though, as a character with a permanent Brave of less than 25 is at risk of abandoning your party entirely.
Talking it Out with the Orator
This is another job that is further up the job tree than a new player will see for a bit, but not particularly difficult to unlock. It has some similarities to the Mystic in terms of buffing and debuffing, so you can use it to help hunt for treasure too.
Beyond that, though, Orator has a couple other things that can be useful. One is that it's the only other job that can equip guns, and it has a support ability to transfer that ability to other jobs too, meaning that with some patience (because it's hard to get JP with the Orator), you can have a gun-toting Knight tank wandering around. The other ability is easier to acquire but is probably slightly less useful to a first-time player: the Entice can let you recruit enemies to your side, who will sometimes offer to join you permanently if they are still allied after the battle ends. This can be a good way to collect equipment from humans or breed monsters for future poaching.
The Orator has the ability to lower the Brave and Faith of certain characters with various spells. Faithless units take less magical damage, and cowardly ones take less physical damage. Cowardly ones are also better at finding rare items on the battlefield, though it's never quite explained why. Be careful, though, as for every five points those stats are reduced, one of those points will stay gone after the battle and would have to be built back up with other abilities.
Jump Around: Dragoon
The Dragoon can - predictably if you've ever played pretty much any other Final Fantasy game - jump on enemies but can only do so if the right abilities are learned. For example, if an enemy is four spaces away, the Dragoon would need to have Horizontal Jump 4 or greater. Likewise, if the enemy is four spaces higher than the Dragoon, the Lancer would need Vertical Jump 4 or greater. The best thing for the Dragoon to do if you want to use them long-term is to save up for the top level of both horizontal and vertical jumps, because they include all levels below.
If that's your route, it's okay, because the Dragoon is a great job to have around. They can equip all the equipment of the Knight except for the fancier swords you won't see much of until later, and they get the benefit of the spear, which can reach two tiles instead of just one, keeping you out of reach of most counterattacks.
In Tune with Mother Gaia, Your Geomancer
Your Geomancer starts basically like a warrior/mage hybrid, with the ability to use standard swords but lighter armor. Where they expand beyond is once they start learning their primary skills.
The Geomancer uses skills based on the current tile they're standing on. Most skills work on a few different types of terrain, and all have the same relatively low JP cost to learn. There are generally many different types of tiles in each battle. If they're standing on, for example, a tile of grass, then the Geomancer would have had to have learned Tanglevine, which is the corresponding ability for that tile. Once you've collected the set, you'll be ready for most everything, but the ones to start with will be Tanglevine, Torrent, Contortion and Wind Blast.
Preparing for the Samurai
Samurai can be a very powerful class, but it's almost stretching the notion of a "newbie" guide because it will almost certainly be one of the later classes you unlock, and its better weapons become available pretty late and are pricey.
You might find that you don't want to use the Samurai's primary ability much either. While each ability can expand the Samurai's range, it also has the risk of destroying the katana used to power it. If you go this route, you'll probably be stocking up and using only the cheaper swords regularly. You also can use the abilities only if you have both the sword in stock and have the ability learned - one or the other is not enough.
But, even if you don't want to use up your katana, the Samurai is an impressive class. It can wear heavier armor and has its own class of strong weapons, and can learn some interesting backup abilities. And, if you combine your Samurai with the Ninja's Dual Wield ability, you can create some big melee damage.
Sing Along with Bard
And now we're really blowing right past the idea of a "newbie" guide because it's completely possible to complete a storyline run of Final Fantasy Tactics without ever unlocking this class. Once you do, you might find that it's not that valuable to you, too. It's hard to get JP with a Bard and that means it's hard to get all the abilities you might want.
But, when a Bard sings, he goes onto autopilot and continue charging turns even while singing. So, if you let him sing without interrupting, the results will come about much faster than if you stop him and then start again later. If you can hide him in a corner and let him work, you'll reap the benefits as you go.
The Dancer's Disco Inferno
Yes, this is a copy/paste from the entry for Bard, why do you ask? Anyway, now we're really blowing right past the idea of a "newbie" guide because it's completely possible to complete a storyline run of Final Fantasy Tactics without ever unlocking this class. Once you do, you might find that it's not that valuable to you, too. It's hard to get JP with a Dancer and that means it's hard to get all the abilities you might want.
But, when a Dancer starts up with her dance, she goes onto autopilot and continue charging turns even while dancing. So, if you let her continue uninterrupted, the results will come about much faster than if you stop her and then start again later. If you can hide her in a corner and let her work, you'll reap the benefits as you go.
Check Your AT
One of the most crucial aspects to Final Fantasy Tactics is AT, the abbreviation used extensively to describe Active Time. Active Time determines when your characters have their turns in battle, but more importantly, when they are able to use abilities. Many abilities, like items, don't require any charging, but many of them, especially magic spells, require that you charge up before they can be cast.
That's where the ability to check your AT comes in handy. When you're about to cast a spell that requires charging, it will have a number to the right on the menu (like, when you're selecting one Black Magic spell from your list). Scroll to the one that you want to cast, then press right. It will show a list of how the battle will progress, turn by turn, and will fit the spell in, so you can see if the target will have a turn or not before it goes off. This is crucial - if you don't check AT, the target could move next to your character, causing them damage on a ranged attack, or even move out of your range completely.
Get Creative with Combinations
When you're making characters with secondary abilities, try to use a secondary ability that complements the job. For example, Holy is the most powerful spell that a generic character can obtain, and a Black Mage has the highest magic power. The result? A Black Mage with White Magic will be able to cast the most powerful available spell with the best effect. Things like this work with many different jobs - if you look over the other entries in this guide that are specific to jobs, you'll find quite a few other basic combinations to try.
Back to topLearning Ultima
You may have heard about learning Ultima in Final Fantasy Tactics, and that is no rumor - but it's not necessarily worth the effort. Only Ramza can learn Ultima, and he must be a Squire to learn it. (In War of the Lions versions, Luso can also learn it if he's in his default class.) It can only be learned in battles with the assassins Celia and Lettie, or with Ultima Demons, who have the ability. If it hits and all the other conditions are met, you're guaranteed to learn it.
The assassins don't like to use it, though; in order to increase your odds of seeing it, you'll want to keep other characters out of range, and you'll want everyone, especially the target for learning it, with equipment to block instant KO, Stop, and Charm statuses.
Signs of the Zodiac
Zodiac Signs in Final Fantasy Tactics help determine the effectiveness and accuracy of some abilities. Some signs have excellent compatibility with others, some have good, some are bad, and some are extremely bad.
Although it takes a lot to consider Zodiac Signs in battles for who will attack who, it might be smart to set up your characters accordingly if you want to have the best chance at stealing equipment from enemies in the late game. Is this something you're going to want to do in your first playthrough? Probably not, as it's in no way required to complete the plot. But if you're the type of player who wants to maximize everything, you'll want to keep it in mind.
Faith and Brave
Faith and Brave are used to determine your character's resistance and application of magical and some physical attacks.
Faith determines how much damage will be given and taken from magical attacks. The higher the character's faith, the more damage they'll take from magic and the more damage they'll deal with magic.
Brave determines how much damage will be given from certain physical attacks, how often your Reaction skill will take action (generally, it works Brave% of the time, so the greater the better), and the chance of getting a rare item while using the Treasure Hunter ability (this time it works [100 - Brave]% of getting the rare item, so the lower the better).
One thing to remember, though, is that if you take steps to increase your Faith too high (permanently over 94), your character will leave the party forever, and if their Brave is too low (permanently below 6), they will do the same but for different reasons.
Vital Statistics
Each character in Final Fantasy Tactics has the same set of statistics - HP, MP, Speed, AT, MA, Move, Jump, and Evade. Most of these will make sense out of the box for RPG players.
- HP represents your health -- when it drops to 0, the character dies.
- MP represents magic points. Each spell costs a certain amount of MP to cast.
- Speed represents how often you'll take action.
- AT represents your physical attack power.
- MA represents your magical attack power.
- Move represents how far you can move on the battle grid.
- Jump represents the level of height you can traverse from square to square on the battle grid without being blocked (and has nothing to do with Dragoon abilities).
- Evade represents how often an enemy's physical attack will be dodged outside of other modifiers.
Stealing and Poaching
Thievery and fur sales may seem like black market activities, but they're perfectly acceptable in the world of Ivalice. Stealing in battle is an excellent way to get weapons and equipment that you wouldn't be able to get otherwise, though some enemies will have the Safeguard ability, which will block all attempts at theft.
The Thief ability Poach allows you to take the enemy with you when you kill it (The person with Poach equipped must deliver the fatal blow) and deliver it to a Fur Shop, where you can buy great items depending on which enemies have been poached. Keep in mind that when you enter the Fur Shop, you must have Poach equipped on the character who killed the enemy in order to be able to purchase the items that the fur will net you.In War of the Lions, this becomes considerably easier as Luso has this ability innately and is also very good at killing monsters.
Warrior's Guild
The Warrior's Guild allows you to create new party members if some of yours have been lost in battle, or if you're starting out at the beginning and want to customize your characters. You can choose from a Male or Female fighter, and you view their statistics before purchasing them. This will allow you to get a character with good Brave or Faith, and a Zodiac Sign that you want. Once you have a feel for the game, you likely won't lose many characters in battle, so you may not need this shop at all other than custom-forming a party on gender and Zodiac lines.
Also worth noting that this shop can't replace any special characters, though, so keep them well-protected!
Errands
Errands are available at the bar in each city once you get to Chapter 2. They offer an easy chance to get quick JP and Gil, along with the possibility of finding treasure which is usually reminiscent of a previous Final Fantasy game. When you take up a errand, you must send three characters off to do it, and they must be generic characters who are human and permanently part of your party.
Then, when a certain amount of days has passed, return to the city and select "Report Job" and you'll hear a synopsis of what the characters did, then you'll receive your reward. You can learn more about this at our Errands.
Coward's Prize
Items are hidden on battlefields on specific squares, and only one with Treasure Hunter will be able to pick them up. However, the chance of finding a rare item is greater if the character's brave is lower. The percentage of finding the common item is equal to the character's brave, so if their brave is very low, it's more likely that they'll get the rare item.
Back to topEnemy Levels
In random battles, the enemies will level up along with you, making them a consistent challenge. The Gil received after a battle is complete also increases with the average enemy level, so tougher random battles will net you more money.
In storyline battles, the levels are set in stone. So, while grinding a lot will keep you getting tough random encounters, it will make some - but not all! - storyline battles far easier to approach.
Leveling Up Quickly
It doesn't take too much to find a good place to level up... for example, at Mandalia Plain, consider killing off all but one enemy, then surrounding it and attacking it and healing it, alternately. You'll get JP, and the enemy will only be able to attack one of your characters at a time.
At Balias Swale, notice that there is a single square of land in the middle of the river. There is a trick here that allows for easy leveling up based on that square. When you enter a battle there, make sure there is an enemy that cannot enter water... for example, any panther-type enemy. Then, kill off every other enemy but that enemy and put one of your characters on that square in the middle of your river. Then, move all of your other characters to the other side of the river, away from the panther. Presto! The panther cannot damage you, and you are free to use Focus over and over to gain levels and job levels. Or, you can just beat up and heal your own party, if you're that kind of sociopath.
Another spot for a good level up is Lenalian Plateau. Again, you'll need to be fighting an enemy that cannot enter water. When you've accomplished that, move all your characters into the patch of water in the corner where there is enough so that no character borders the land. When you've done this, the enemy cannot hurt you, and you're free to Focus to gain experience and job points.
Climb Higher
Characters can attack if they are three height levels higher than the person they are attacking, but they can't attack if the person is three above them. Therefore, if you have an opportunity to attack someone from three up, take it, because they won't be able to counter. In the same notion, the most you can attack from below someone is two, so beware of attacking the square if they're higher than that. Also, if the enemy is two above you but also has Float, that counts as three spaces and your attack will miss.
Also, when going downhill, ranged weapons add another tile to their range. This can allow you to put even more space between you and the enemy.
Cover Your Back
If an enemy attacks you from the back, the chance that the attack will succeed is significantly higher than if they attack you from the front. Even attacking from the side has a better chance than attacking from the front. So always take into consider which direction you Wait in, because if your back is exposed, you'll likely be hit. On the same token, if you have the opportunity to attack an enemy from behind or from the side, take it.
Back to topPermadeath and Crystals
When someone dies in battle, a number appears over their head. This number represents the number of turns there are before the character will disappear forever and cannot be revived.
If it's one of your characters, revive them quickly or you'll never be able to get them back.
When the number expires, there will either be a treasure chest or a crystal in the character's place. If you pick up the crystal, you can either recover your HP and MP completely or inherit some of the abilities that that character knew. If you get the treasure chest, it's usually an item or some equipment that they had on. Monster crystals can never provide abilities, not even to other monsters.
Don't be fooled by undead creatures! When their timer expires, the game mechanics roll the dice on if they can resurrect. If they come back, it won't be at full HP, but it can be a nasty surprise if you've moved your lines beyond them and are suddenly flanked.
Working Together
When you're trying to level up a couple people in the same job, consider making your entire party that same job. You'll all level up jobs much quicker, because when one character gains JP in battle, everyone else gains 1/6 that amount in that job. So, if you have five Squires in one battle, everyone will gain 10/6 the amount of JP, each round, that they would running solo.
This of course works with any job, but be careful to have a variety of secondary abilities at play or else a strong random encounter could ruin your day!
The Power of Healing
When you're fighting undead enemies, like skeletons, consider using
 Phoenix Downs on them. It will kill them instantly. Any curative items, like
Potions, will damage undead enemies to the same amount as they heal other units.
Phoenix Downs on them. It will kill them instantly. Any curative items, like
Potions, will damage undead enemies to the same amount as they heal other units.
Version 6
©1997–2026 Josh Alvies (Rangers51)
All fanfiction and fanart (including original artwork in forum avatars) is property of the original authors. Some graphics property of Square Enix.