Final Fantasy VII Walkthrough
3.4: The First Gathering Place
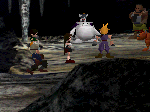
You will enter a room with two stalactites. On the bottom, after the second stalactite, your partners are waiting for you.
This area is one of the favored spots to place the Save Crystal, for several reasons. The obvious is that it lets you experiment with the directions you give to the different characters (that is, if you save after the first stalactite but before the second one), but this spot is also right in the middle of the dungeon, and gives you quick access to the different parts of the Crater. However, it’s still a little away from the point of no return (the second gathering place), which is the other favored spot for the Save Crystal. It is entirely up to you to use it at this point or the other.
When you join up with your teammates, they will ask you where you want them to go. This is an important decision, because depending on where you send them, they will or won’t give you items when you rejoin with them on the second gathering place.
An important thing to notice is that the left path immediately splits into two different paths, each leading east: we’ll call Left A the upper path, and Left B the lower path. Also, while it is possible to go back up in the first gathering place using the Left B path, the other two are one way only: if you missed some items, you will have to go back all the way to the first gathering place.
One other important thing to know about this is that when you reach the second gathering place, they will give you items indeed, but all the treasure chests on the path they took will be opened. This means that you can permanently miss some treasure chests, and potentially some valuable items and equipment.
Fortunately, a trick exists that will guarantee that you get all the items available. What’s even better, this trick will allow you to have a third  Mystile, something which wouldn’t be available if you played ordinarily. The trick involves sending Cloud on the left path, and all the other characters on the right path. Then, go down the left path, and take the upper route on the right (passage Left A). Collect all items, until you reach the second place of gathering. Then go up and collect all items in the Left B passage. Finally, when reaching the room with the two stalactites, go down the right path and collect all the treasures on your way. When you reach the second place of gathering, continue down west until your partners call you and show up. Finally, talk to them and they’ll give you items they “got on the way”, giving you duplicates of things you already acquired.
However, this trick is dangerous, as it leaves Cloud alone on every path. The right path will let you encounter the Dragon Zombie, one of the most fearsome creature in the Crater. Path Laft A holds different monsters, none of which pose any dangerous threat. Path Left B has the same monsters you’ve been fighting since then. In any case, using an  Enemy Away will help you while trying to take advantage of this trick
When you have made your choice, just head over the relevant chapter of the walkthrough for either the Right Path, the Left A Path or the Left B Path.
Version 6
©1997–2024 Josh Alvies (Rangers51)
All fanfiction and fanart (including original artwork in forum avatars) is property of the original authors. Some graphics property of Square Enix.
