Final Fantasy VI Bosses
You may be here looking at the Final Fantasy VI bosses in order to figure out how to beat them. We've included brief strategies for them here, but in virtually all cases, you may find more detail than we can fit here by visiting the walkthrough.
Enemies | Bosses | All | GBA Additions
Left Blade  Bestiary #295 |
Type |
Level |
HP |
MP |
Gil |
EXP |
||||||||||||||||||
None | 22 | 700 | 470 | 0 | 0 | |||||||||||||||||||
Strength |
Magic Atk. |
Evasion |
Defense |
Mag. Def. |
Mag. Evade |
|||||||||||||||||||
13 | 5 | 0 | 120 | 150 | 0 | |||||||||||||||||||
Stolen Items |
Dropped Items |
|||||||||||||||||||||||
None | None | |||||||||||||||||||||||
Status Immunities | Elemental Immunities | |||||||||||||||||||||||
None | ||||||||||||||||||||||||
Elemental Absorb | Elemental Weakness | |||||||||||||||||||||||
None | ||||||||||||||||||||||||
Lores | Command Immunities | |||||||||||||||||||||||
None | Control | |||||||||||||||||||||||
Leviathan  Bestiary #346 |
Type |
Level |
HP |
MP |
Gil |
EXP |
||||||||||||||||||
None | 91 | 32000 | 7000 | 10000 | 0 | |||||||||||||||||||
Strength |
Magic Atk. |
Evasion |
Defense |
Mag. Def. |
Mag. Evade |
|||||||||||||||||||
22 | 14 | 20 | 140 | 120 | 20 | |||||||||||||||||||
Stolen Items |
Dropped Items |
|||||||||||||||||||||||
None | None | |||||||||||||||||||||||
Status Immunities | Elemental Immunities | |||||||||||||||||||||||
None | ||||||||||||||||||||||||
Elemental Absorb | Elemental Weakness | |||||||||||||||||||||||
None | ||||||||||||||||||||||||
Lores | Command Immunities | |||||||||||||||||||||||
Control | ||||||||||||||||||||||||
Long Arm 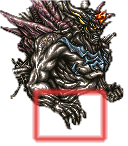 Bestiary #357 |
Type |
Level |
HP |
MP |
Gil |
EXP |
||||||||||||||||||
None | 73 | 33000 | 10000 | 0 | 0 | |||||||||||||||||||
Strength |
Magic Atk. |
Evasion |
Defense |
Mag. Def. |
Mag. Evade |
|||||||||||||||||||
35 | 30 | 5 | 110 | 150 | 0 | |||||||||||||||||||
Stolen Items |
Dropped Items |
|||||||||||||||||||||||
Common: Elixir | None | |||||||||||||||||||||||
Status Immunities | Elemental Immunities | |||||||||||||||||||||||
None | ||||||||||||||||||||||||
Elemental Absorb | Elemental Weakness | |||||||||||||||||||||||
None | ||||||||||||||||||||||||
Lores | Command Immunities | |||||||||||||||||||||||
None | Control, Sketch, Scan | |||||||||||||||||||||||
Machine 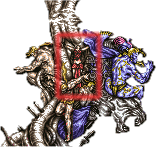 Bestiary #360 |
Type |
Level |
HP |
MP |
Gil |
EXP |
||||||||||||||||||
None | 73 | 24000 | 10000 | 0 | 0 | |||||||||||||||||||
Strength |
Magic Atk. |
Evasion |
Defense |
Mag. Def. |
Mag. Evade |
|||||||||||||||||||
13 | 10 | 0 | 105 | 153 | 0 | |||||||||||||||||||
Stolen Items |
Dropped Items |
|||||||||||||||||||||||
Common: Elixir | None | |||||||||||||||||||||||
Status Immunities | Elemental Immunities | |||||||||||||||||||||||
None | ||||||||||||||||||||||||
Elemental Absorb | Elemental Weakness | |||||||||||||||||||||||
None | ||||||||||||||||||||||||
Lores | Command Immunities | |||||||||||||||||||||||
None | Control, Sketch, Scan | |||||||||||||||||||||||
Magic 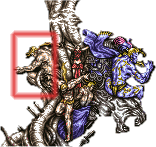 Bestiary #361 |
Type |
Level |
HP |
MP |
Gil |
EXP |
||||||||||||||||||
Humanoid | 72 | 41000 | 10000 | 0 | 0 | |||||||||||||||||||
Strength |
Magic Atk. |
Evasion |
Defense |
Mag. Def. |
Mag. Evade |
|||||||||||||||||||
1 | 8 | 0 | 145 | 125 | 0 | |||||||||||||||||||
Stolen Items |
Dropped Items |
|||||||||||||||||||||||
Common: Elixir | None | |||||||||||||||||||||||
Status Immunities | Elemental Immunities | |||||||||||||||||||||||
None | ||||||||||||||||||||||||
Elemental Absorb | Elemental Weakness | |||||||||||||||||||||||
None | ||||||||||||||||||||||||
Lores | Command Immunities | |||||||||||||||||||||||
None | Control, Sketch, Scan | |||||||||||||||||||||||
Magic Master  Bestiary #330 |
Type |
Level |
HP |
MP |
Gil |
EXP |
||||||||||||||||||
Humanoid | 68 | 50000 | 50000 | 0 | 0 | |||||||||||||||||||
Strength |
Magic Atk. |
Evasion |
Defense |
Mag. Def. |
Mag. Evade |
|||||||||||||||||||
1 | 25 | 100 | 250 | 100 | 0 | |||||||||||||||||||
Stolen Items |
Dropped Items |
|||||||||||||||||||||||
Common: Megalixir | ||||||||||||||||||||||||
Status Immunities | Elemental Immunities | |||||||||||||||||||||||
None | ||||||||||||||||||||||||
Elemental Absorb | Elemental Weakness | |||||||||||||||||||||||
Variable | None | |||||||||||||||||||||||
Lores | Command Immunities | |||||||||||||||||||||||
None | Control | |||||||||||||||||||||||
Strategy | ||||||||||||||||||||||||
Yeeesh. First turn, he casts a level two spell. Then, he casts a level 3 spell. Then, he casts two level 3 spells. After that, it'll follow up with another double cast of two level 3 spells. On the fifth turn, it'll use a single level 3 spell, and, on his last turn before looping, Magic Master can make use of You may have noticed that every spell Magic Master uses is reflectable; yes, that they are. However, the thing about Magic Master is that not only is he the ultimate mage, he's also fiercely loyal to Kefka. Given this, it's only logical that Magic Master would be able to cast the strongest spell in the game: Let's go through a few potential situations now: If you've followed the walkthrough, or know Without Alternately, you could just damage the boss a lot and summon If you don't have | ||||||||||||||||||||||||
Magitek Armor  Bestiary #279 |
Type |
Level |
HP |
MP |
Gil |
EXP |
||||||||||||||||||
None | 8 | 210 | 250 | 0 | 0 | |||||||||||||||||||
Strength |
Magic Atk. |
Evasion |
Defense |
Mag. Def. |
Mag. Evade |
|||||||||||||||||||
18 | 3 | 0 | 30 | 130 | 0 | |||||||||||||||||||
Stolen Items |
Dropped Items |
|||||||||||||||||||||||
Common: Hi-Potion | ||||||||||||||||||||||||
Status Immunities | Elemental Immunities | |||||||||||||||||||||||
None | ||||||||||||||||||||||||
Elemental Absorb | Elemental Weakness | |||||||||||||||||||||||
None | ||||||||||||||||||||||||
Lores | Command Immunities | |||||||||||||||||||||||
None | Control | |||||||||||||||||||||||
Metamorph Package | ||||||||||||||||||||||||
Malboro Menace  Bestiary #372 |
Type |
Level |
HP |
MP |
Gil |
EXP |
||||||||||||||||||
None | 92 | 15000 | 2000 | 0 | 5000 | |||||||||||||||||||
Strength |
Magic Atk. |
Evasion |
Defense |
Mag. Def. |
Mag. Evade |
|||||||||||||||||||
13 | 9 | 0 | 144 | 109 | 0 | |||||||||||||||||||
Stolen Items |
Dropped Items |
|||||||||||||||||||||||
Common: Potion | ||||||||||||||||||||||||
Status Immunities | Elemental Immunities | |||||||||||||||||||||||
None | ||||||||||||||||||||||||
Elemental Absorb | Elemental Weakness | |||||||||||||||||||||||
Lores | Command Immunities | |||||||||||||||||||||||
None | Control | |||||||||||||||||||||||
Strategy | ||||||||||||||||||||||||
Malboro Menace will just try to take you down with status-inducing attacks such as the bloody obvious | ||||||||||||||||||||||||
Master Tonberry  Bestiary #328 |
Type |
Level |
HP |
MP |
Gil |
EXP |
||||||||||||||||||
None | 73 | 22000 | 1200 | 0 | 0 | |||||||||||||||||||
Strength |
Magic Atk. |
Evasion |
Defense |
Mag. Def. |
Mag. Evade |
|||||||||||||||||||
13 | 9 | 0 | 100 | 165 | 0 | |||||||||||||||||||
Stolen Items |
Dropped Items |
|||||||||||||||||||||||
Common: | ||||||||||||||||||||||||
Status Immunities | Elemental Immunities | |||||||||||||||||||||||
None | ||||||||||||||||||||||||
Elemental Absorb | Elemental Weakness | |||||||||||||||||||||||
Variable | None | |||||||||||||||||||||||
Lores | Command Immunities | |||||||||||||||||||||||
Control | ||||||||||||||||||||||||
Strategy | ||||||||||||||||||||||||
Master Tonberry is very mean. He'll start the battle off with a Battle attack, and after this the madness will begin. Every 15 seconds, Master Tonberry takes a step forward; after seven steps, he'll use !Knife on a random character and retreat halfway back, meaning that he'll have to take just four more steps after that to reach the !Knife position again. Every step is accompanied with the ever-frustrating Barrier Change attack. Master Tonberry casts spells of the type opposing his current weakness, not unlike Number 024 way back in the day. Each time he changes his weakness, he has a two in three chance of using a magical attack that will indicate what his new weakness is. This will give you a chance to load up on that weakness until it changes again.
One of the worst parts of this battle, though, is Master Tonberry's The way to victory lies in the enemy's status ailment vulnerabilities. Cast | ||||||||||||||||||||||||
Missile Bay  Bestiary #304 |
Type |
Level |
HP |
MP |
Gil |
EXP |
||||||||||||||||||
None | 25 | 3000 | 7000 | 0 | 0 | |||||||||||||||||||
Strength |
Magic Atk. |
Evasion |
Defense |
Mag. Def. |
Mag. Evade |
|||||||||||||||||||
12 | 8 | 0 | 135 | 150 | 0 | |||||||||||||||||||
Stolen Items |
Dropped Items |
|||||||||||||||||||||||
Common: | None | |||||||||||||||||||||||
Status Immunities | Elemental Immunities | |||||||||||||||||||||||
None | ||||||||||||||||||||||||
Elemental Absorb | Elemental Weakness | |||||||||||||||||||||||
None | ||||||||||||||||||||||||
Lores | Command Immunities | |||||||||||||||||||||||
None | None | |||||||||||||||||||||||
Moebius  Bestiary #325 |
Type |
Level |
HP |
MP |
Gil |
EXP |
||||||||||||||||||
Humanoid | 47 | 12500 | 2000 | 0 | 0 | |||||||||||||||||||
Strength |
Magic Atk. |
Evasion |
Defense |
Mag. Def. |
Mag. Evade |
|||||||||||||||||||
4 | 6 | 0 | 80 | 130 | 0 | |||||||||||||||||||
Stolen Items |
Dropped Items |
|||||||||||||||||||||||
None | None | |||||||||||||||||||||||
Status Immunities | Elemental Immunities | |||||||||||||||||||||||
None | ||||||||||||||||||||||||
Elemental Absorb | Elemental Weakness | |||||||||||||||||||||||
None | ||||||||||||||||||||||||
Lores | Command Immunities | |||||||||||||||||||||||
None | Control | |||||||||||||||||||||||
Strategy | ||||||||||||||||||||||||
Curlax is the strongest of the three Dream Stooges, and also the most vital one to take down. He has a random shot at casting Laragorn is the weakest of the three Dream Stooges; his amount of HP is the lowest and his status vulnerabilities are horrible; as if Death wasn't enough, he's an almost exclusive spell caster susceptible to Moebius is the middle child, and the only one without an elemental weakness. His bane is the Berserk status, and he has the Lightning-element. Like his brethren, he casts Delta Attack after 30 seconds, will cast A note about Delta Attack: when the global battle timer reaches 30, the first Stooge to act will attack with Delta Attack. After that, the global timer is set to 0, so that neither of the other two Stooges can use it. In other words, every 30 seconds only one Delta Attack will appear, not three. How to fight this battle? Set Mute on Laragorn (the So long as you know what you're doing, it's really an easy battle; barriers like | ||||||||||||||||||||||||
Nelapa  Bestiary #308 |
Type |
Level |
HP |
MP |
Gil |
EXP |
||||||||||||||||||
Humanoid | 26 | 2800 | 280 | 0 | 0 | |||||||||||||||||||
Strength |
Magic Atk. |
Evasion |
Defense |
Mag. Def. |
Mag. Evade |
|||||||||||||||||||
11 | 10 | 0 | 105 | 150 | 0 | |||||||||||||||||||
Stolen Items |
Dropped Items |
|||||||||||||||||||||||
None | None | |||||||||||||||||||||||
Status Immunities | Elemental Immunities | |||||||||||||||||||||||
Elemental Absorb | Elemental Weakness | |||||||||||||||||||||||
Lores | Command Immunities | |||||||||||||||||||||||
Control | ||||||||||||||||||||||||
Strategy | ||||||||||||||||||||||||
The big sparkle's name is Nelapa. He gets 10 out of 10 for style, but minus one billion for good thinking. I mean, here you are, with a timer quickening your pace, and he thinks it's a good idea to cast Sillier yet, the battle with Nelapa (or a Naude) will automatically terminate as soon as the global timer hits 0:04 seconds; enough time to dive from the Floating Continent to "safety". What was the point of the timer in the first place? 0:04 isn't enough time to wait for that special someone, though... Anyway, after the pompous chatter and casting Anyway, back to not insulting this guy into submission (although you could). He's weak to Lightning and Ice and Holy. He's also Floating. Just make sure you keep in the back of your mind this guy is inherently Reflective, which means you'll need to resort to your skills and summon attacks. There are literally hundreds of ways to off this guy, and they're all very easy. Gau's Mu Rage can enSnare him for a one-hit KO, as can a fatal Just use your strongest attacks, be it Gigavolt, or Aura Cannon, or Diamond Dust, or what have you. Nelapa has 2800 HP. That's it. If you played your cards right, you were doing 2800 in one attack back there against Ultima Weapon. Pushover. Expand Full Strategy | ||||||||||||||||||||||||
Neslug (Head) .png) Bestiary #369 |
Type |
Level |
HP |
MP |
Gil |
EXP |
||||||||||||||||||
None | 97 | 62000 | 62000 | 50000 | 0 | |||||||||||||||||||
Strength |
Magic Atk. |
Evasion |
Defense |
Mag. Def. |
Mag. Evade |
|||||||||||||||||||
50 | 20 | 50 | 180 | 195 | 50 | |||||||||||||||||||
Stolen Items |
Dropped Items |
|||||||||||||||||||||||
None | None | |||||||||||||||||||||||
Status Immunities | Elemental Immunities | |||||||||||||||||||||||
None | ||||||||||||||||||||||||
Elemental Absorb | Elemental Weakness | |||||||||||||||||||||||
Lores | Command Immunities | |||||||||||||||||||||||
None | Control | |||||||||||||||||||||||
Strategy | ||||||||||||||||||||||||
Here's the thing. Neslug's Head will pop in and out of the shell every now and then. It'll start the battle with a The defense isn't difficult. Throw up the Maginot Line to protect yourself from !Tongue Bath and !Megaton Smash and the stray physicals and equip Neslug's awesome Magic Defense ensures that things aren't quite as simple as you'd like them to be. Barrier-piercing fire-elemental attacks reign supreme. Flare Star is a good one coming from Gau and/or Gogo, as is the | ||||||||||||||||||||||||
Neslug (Shell) .png) Bestiary #368 |
Type |
Level |
HP |
MP |
Gil |
EXP |
||||||||||||||||||
None | 97 | 62000 | 62000 | 50000 | 0 | |||||||||||||||||||
Strength |
Magic Atk. |
Evasion |
Defense |
Mag. Def. |
Mag. Evade |
|||||||||||||||||||
60 | 20 | 0 | 255 | 255 | 0 | |||||||||||||||||||
Stolen Items |
Dropped Items |
|||||||||||||||||||||||
None | None | |||||||||||||||||||||||
Status Immunities | Elemental Immunities | |||||||||||||||||||||||
None | ||||||||||||||||||||||||
Elemental Absorb | Elemental Weakness | |||||||||||||||||||||||
Lores | Command Immunities | |||||||||||||||||||||||
None | Control | |||||||||||||||||||||||
Number 024  Bestiary #292 |
Type |
Level |
HP |
MP |
Gil |
EXP |
||||||||||||||||||
Humanoid | 24 | 4777 | 777 | 0 | 0 | |||||||||||||||||||
Strength |
Magic Atk. |
Evasion |
Defense |
Mag. Def. |
Mag. Evade |
|||||||||||||||||||
20 | 3 | 0 | 170 | 100 | 0 | |||||||||||||||||||
Stolen Items |
Dropped Items |
|||||||||||||||||||||||
Status Immunities | Elemental Immunities | |||||||||||||||||||||||
None | ||||||||||||||||||||||||
Elemental Absorb | Elemental Weakness | |||||||||||||||||||||||
Variable | None | |||||||||||||||||||||||
Lores | Command Immunities | |||||||||||||||||||||||
None | Control | |||||||||||||||||||||||
Strategy | ||||||||||||||||||||||||
Machines tend to have that crippling weakness to Lightning, and they also usually have some sort of Program ## move to dish out. This guy has neither. He uses spells and wields swords, so you'd almost assume he was a human if it wasn't for the 'System error!' message that goes off in the middle of the battle. A cyborg, then, like the Sergeant? We can only guess. The facts remain that Number 024, while no real challenge even if you forget about his status ailment weaknesses, is just so darn versatile we still love him anyway. The guy's main move, Barrier Change, shuffles all the elemental properties of the caster and picks one element to set as its weakness. Then, it sets one element as the element it absorbs. First effects: You'll never know what exactly your elemental attacks will do: 75% chance they'll do nothing, 12.5% chance they'll heal him, 12.5% chance they'll do double damage. Conclusion: Waste of time, think of alternative means of violence. But this fellow adapts his fighting style according to his weakness. You can sort his weakness from what he hits you with, if you like. If his weakness is fire, you'll see ice attacks. Vice versa, too. If lightning, you'll see water. Again, vice versa. If it's wind, he'll use earth-based attacks like Magnitude 8 and Cave In, and if it's earth he'll go to wind attacks like Sonic Boom and Gale Cut. If he's weak to poison, he'll try to cure himself, and if he's weak to Holy-elemental, he'll try to attack you physically or use Reverse Polarity. Here's what he'll do. He'll simply strike you physically for 30 seconds (this first round doesn't indicate Holy weakness). Then, he'll do his first Barrier Change. When you manage to strike his weakness (you can figure it out via Libra spell), he'll perform it again. If 30 seconds of action elapses first instead (are you taking a nap?), he'll perform another Barrier Change anyway. After he has performed a Barrier Change three times, he'll go haywire, even though you haven't destroyed him; the result of this 'System error' is apparently calling up Arctic Hares (the more successful branch of the Lagomorph family), enjoying Sunbaths, and finding his true self with the Libra spell. After 30 seconds of this, he'll snap out of it again, starting over as if he had cast his first Barrier Change of the battle. Weird stuff, man. But you won't have to see all this madness. The | ||||||||||||||||||||||||
Number 128  Bestiary #293 |
Type |
Level |
HP |
MP |
Gil |
EXP |
||||||||||||||||||
None | 23 | 3276 | 810 | 0 | 0 | |||||||||||||||||||
Strength |
Magic Atk. |
Evasion |
Defense |
Mag. Def. |
Mag. Evade |
|||||||||||||||||||
13 | 3 | 0 | 120 | 125 | 0 | |||||||||||||||||||
Stolen Items |
Dropped Items |
|||||||||||||||||||||||
Common: | Common: Tent | |||||||||||||||||||||||
Status Immunities | Elemental Immunities | |||||||||||||||||||||||
None | ||||||||||||||||||||||||
Elemental Absorb | Elemental Weakness | |||||||||||||||||||||||
None | ||||||||||||||||||||||||
Lores | Command Immunities | |||||||||||||||||||||||
None | Control | |||||||||||||||||||||||
Strategy | ||||||||||||||||||||||||
Number 128 is not so much a human with the cybernetic parts in him as a robot with flesh on it. To top it, he's stronger than anything you've ever encountered so far. There are three attacking parts here, and only three party members. The absolute worst part is the fact that he carries a very rare sword on him, a sword that will remain useful throughout the entire game, of which only two exist; one in a chest you'll find two dungeons from now, one as a rare steal on this very opponent. It's by no means horrible if you don't obtain it, but it's really nice if you do. There are two blades. Left Blade and Right Blade. They're to the left and right of Number 128. Hence their names. They attack physically every round, and throw in a mean Special if you're in bad luck. If you kill them, they'll be back within 15 seconds. Left Blade knows Shamshir, which is especially dangerous as it reveals invisible characters. The main body is the worst, as you could imagine. Physical strikes more powerful than those of the blades, a Special that drains HP, the ability to cast the So here's the strategy if you don't have
Number 128 is one of the most dangerous opponents of the game given its relative setting, and if your luck is just really, really bad it's possible to die even if you're a rather experienced player, especially if you're trying to get the | ||||||||||||||||||||||||
Omega Weapon  Bestiary #384 |
Type |
Level |
HP |
MP |
Gil |
EXP |
||||||||||||||||||
None | 97 | 65000 | 65000 | 0 | 0 | |||||||||||||||||||
Strength |
Magic Atk. |
Evasion |
Defense |
Mag. Def. |
Mag. Evade |
|||||||||||||||||||
111 | 30 | 55 | 222 | 222 | 55 | |||||||||||||||||||
Stolen Items |
Dropped Items |
|||||||||||||||||||||||
Common: Megalixir | Common: | |||||||||||||||||||||||
Status Immunities | Elemental Immunities | |||||||||||||||||||||||
None | ||||||||||||||||||||||||
Elemental Absorb | Elemental Weakness | |||||||||||||||||||||||
None | None | |||||||||||||||||||||||
Lores | Command Immunities | |||||||||||||||||||||||
None | Control | |||||||||||||||||||||||
Strategy | ||||||||||||||||||||||||
Omega Weapon's first life will use monster attacks. These include randomly (enemy) Ideally, all characters are of suitable level to avoid The second life will be Omega Weapon in machine mode. It will randomly use any of the following attacks: Atomic Ray, Absolute Zero, Delta Attack, Blaster, Launcher, Wave Cannon, Magnitude 8, Gravity Bomb, Launcher and Metal Cutter. Every 20 seconds, Omega Weapon will glow and will use Mind Blast on the subsequent turn. When killed, Omega Weapon will use Heartless Angel to reduce all characters down to Critical status and move on to its third and final life. When struck by any kind of attack, Omega Weapon will counterattack twice; the first counter is either a physical (1/3) or Missile (2/3), the second is either Missile (2/3) or Blaster (2/3). Delta Attack and Mind Blast, otherwise supreme nuisances, will have no effect due to your The last life of Omega Weapon is him combining the previous two AI scripts together, using two attacks (one from both lives) every turn. It will now counter twice: the first counter is either !Omega Drive or Freezing Dust, the second counter is either !Omega Drive or Blaster. The level-based Lores will make another appearance, by the way. Every 20 seconds, Omega Weapon will glow and use Forsaken the subsequent turn, which is quite powerful but managable. If not, there's always The trick during all three lives is to avoid Omega Weapon counterattacks, as they are often the most debilitating (Freezing Dust, Dischord, Blaster). Use If the above strategy is well-played, Omega Weapon will be a very easy target. Without | ||||||||||||||||||||||||
Phantom Train  Bestiary #284 |
Type |
Level |
HP |
MP |
Gil |
EXP |
||||||||||||||||||
Undead | 14 | 1900 | 350 | 0 | 0 | |||||||||||||||||||
Strength |
Magic Atk. |
Evasion |
Defense |
Mag. Def. |
Mag. Evade |
|||||||||||||||||||
10 | 5 | 0 | 30 | 210 | 0 | |||||||||||||||||||
Stolen Items |
Dropped Items |
|||||||||||||||||||||||
None | Common: Tent | |||||||||||||||||||||||
Status Immunities | Elemental Immunities | |||||||||||||||||||||||
None | ||||||||||||||||||||||||
Elemental Absorb | Elemental Weakness | |||||||||||||||||||||||
Lores | Command Immunities | |||||||||||||||||||||||
None | Control | |||||||||||||||||||||||
Strategy | ||||||||||||||||||||||||
The Phantom Train will start with the battle with either a physical attack, !Wheel, or Diabolic Whistle. The next four turns will be spent using normal physical attacks and his Special !Wheel; the fifth turn will be Diabolic Whistle, but only if there are at least two characters still alive. After every 15 seconds of battle, Phantom Train will use either Acid Rain (2/3) or Saintly Beam, an attack that deals multi-target Holy-elemental damage to your party. Finally, if Phantom Train has been damaged, he has a one in three chance of using !Wheel. For trivia, Saintly Beam used to be Phantom Train-exclusive until Holy Dragon Redux showed its pasty face for the Advance release. Given it's such a nasty move in that fight, its occurrence here at least shows the Phantom Train was on the right track. The fight against Phantom Train can be real easy and real bad, and it all depends on his Diabolic Whistle attack. This sets one random status ailment on your party out of the following: Darkness, Poison, Imp, Doom, Berserk, Confused, Sap and Slow. Due to a GBA-exclusive bug, you can circumvent all effects from this attack by equipping a Relic which protects against Imp (such as the The ones you need to be concerned about are Imp, Berserk, and Confused. If one of your characters is Imped, you'll want to use Hi-Potions to damage Phantom Train. Hi-Potions inflict 250 worth of HP damage, which is superior to your crummy Imped Attack command. Smack your Confused characters, as there's nothing more fatal than Confused characters, especially when they have access to Rising Phoenix or barrier-piercing attacks. The Phantom Train battle is very much like the Apparition battle in the sense that using a Phoenix Down is the coward's way out, and that the strategy revolves around allowing Cyan to start the battle with his third Bushido skill, Tiger. After this, have Sabin come in with an Aura Cannon and Shadow with | ||||||||||||||||||||||||
Plague  Bestiary #366 |
Type |
Level |
HP |
MP |
Gil |
EXP |
||||||||||||||||||
None | 79 | 22000 | 12000 | 0 | 5000 | |||||||||||||||||||
Strength |
Magic Atk. |
Evasion |
Defense |
Mag. Def. |
Mag. Evade |
|||||||||||||||||||
31 | 20 | 250 | 130 | 160 | 180 | |||||||||||||||||||
Stolen Items |
Dropped Items |
|||||||||||||||||||||||
None | Common: | |||||||||||||||||||||||
Status Immunities | Elemental Immunities | |||||||||||||||||||||||
None | ||||||||||||||||||||||||
Elemental Absorb | Elemental Weakness | |||||||||||||||||||||||
None | None | |||||||||||||||||||||||
Lores | Command Immunities | |||||||||||||||||||||||
None | Control | |||||||||||||||||||||||
Strategy | ||||||||||||||||||||||||
Plague is a blue Ahriman that will use There are numerous ways to work around the full-party Equip Prepare to face | ||||||||||||||||||||||||
Power 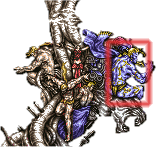 Bestiary #362 |
Type |
Level |
HP |
MP |
Gil |
EXP |
||||||||||||||||||
Humanoid | 73 | 28000 | 10000 | 0 | 0 | |||||||||||||||||||
Strength |
Magic Atk. |
Evasion |
Defense |
Mag. Def. |
Mag. Evade |
|||||||||||||||||||
6 | 9 | 0 | 115 | 153 | 0 | |||||||||||||||||||
Stolen Items |
Dropped Items |
|||||||||||||||||||||||
Common: Elixir | None | |||||||||||||||||||||||
Status Immunities | Elemental Immunities | |||||||||||||||||||||||
None | ||||||||||||||||||||||||
Elemental Absorb | Elemental Weakness | |||||||||||||||||||||||
None | ||||||||||||||||||||||||
Lores | Command Immunities | |||||||||||||||||||||||
None | Control, Sketch, Scan | |||||||||||||||||||||||
Strategy | ||||||||||||||||||||||||
Tiger will act very rarely, but, when it does, the effects tend to be less than desirable for your part of this ordeal. Characters that absorb Fire are relatively safe from Tiger's attacks, but it'll be rough for the others. Tiger's normal AI script reads Nothing - strong attack - Nothing - 1/3 Battle - loop, but once you pound it below 11520 it'll get mad and start using the strong attacks every turn, with a 1/3 chance of using !Zombie Fang in the same turn immediately afterwards. This frenzied Tiger is far and away the most troublesome opponent of this tier and is priority number one as a result. Since his elemental weakness is the popular and easily exploitable Ice-elemental variant, If you'd thought that you had seen the last of those repetitive machine moves when you destroyed the Empire's most powerful weapon, you had better think again. Machine is less than picky with its AI script and will randomly use any of its attacks in any situation with only one quirk: Once Machine hits 11520 HP, it'll stop using Atomic Rays and start using the ever-so-slightly stronger Absolute Zero attack. Magic uses spells. A lot of them. It has all kinds of conditions too, so allow me to present them to you: Normally, it's Power hits you. Every turn it uses Battle. It never rests or does something remotely interesting; it just sits there and pounds every character it can get its hands on. When it dies, it uses !10-Hit Combo once and follows up with nine Battle attacks before croaking for good. Obviously you were supposed to expect a tenth hit here, but luckily you have me to suck the fun out of every single one of those little tricks. You should still be buffed up from the previous battle, so there's no need to redo it now. Don't touch Focus all your attacks on Tiger. Like I said, After you've killed Magic (there's no special tricks), you'll probably have one or more characters who have lost their positive statuses due to !Zombie Fang, dying in some other manner, or | ||||||||||||||||||||||||
Enemies | Bosses | All | GBA Additions
Caves of Narshe: Final Fantasy VI
Version 6
©1997–2024 Josh Alvies (Rangers51)
All fanfiction and fanart (including original artwork in forum avatars) is property of the original authors. Some graphics property of Square Enix.
Version 6
©1997–2024 Josh Alvies (Rangers51)
All fanfiction and fanart (including original artwork in forum avatars) is property of the original authors. Some graphics property of Square Enix.